PATTERN MAGIC

Austrian artist Koloman Moser is known for his Art Nouveau style patterns. This is such a gorgeous example of a tessellation motif.
Introduction
Pattern language – A voice in cloth
I have always loved the way textiles, can speak volumes. Speak of who we are.
Patterns in cloth have preserved the voices of many cultures over centuries, whether personal or regional motifs, their lexicon of meanings has been de-coded throughout history to tell us stories and allow us to gain deeper insights into the communities behind the fabric.
I love also, how we’re all textile connoisseurs of a kind, with our innate need to touch fabric. To ‘feel’ whether we like it, as well as by seeing it.
This tactility and fragility of cloth, are where the deepest memories are held, even a scrap of fabric can be a time capsule, a record of history, culture and time.
Alongside this, there is also the language within the process of making, and for me, textile printing is where I find my calm, through the mediative effects of repetition and rhythm. It’s a very therapeutic process and a way to slow down.
Colours and patterns evolve, and in them, is a place to seek out simplicity. The pattern is everywhere we go and it's in everything we do and I’m constantly in awe of it!
I wanted to share a quick insight, into some pattern simplicity and making pattern repeats. This will hopefully give you a taster of what can be achieved in the block printing workshops, where we get to escape from our overloaded lives and create some of our own textile memories.
Enjoy,
Katie, x

Students work, 1 day block printing class.
Pattern repeat - textile printing
There are a few different ways to tackle a pattern repeat, and I wanted to share a little bit of what I have learnt over the years.
Or should I say, what my students have taught me over the years! The following examples cover the basics for simple block printing designs.
A good pattern repeat should appear seamless – and have a good rhythm to it, without jolting the eye.
Does it look right? Is it too repetitive? Is the scale too large? Does it look forced?
I will describe some of the most common ways to think about pattern repeats, with some practical and fun exercises for you to try at home.
Block Repeat
The most simplest form of a pattern repeat is a block pattern. Quite simply, this is where the motif is repeated in exactly the same way both horizontally and vertically.
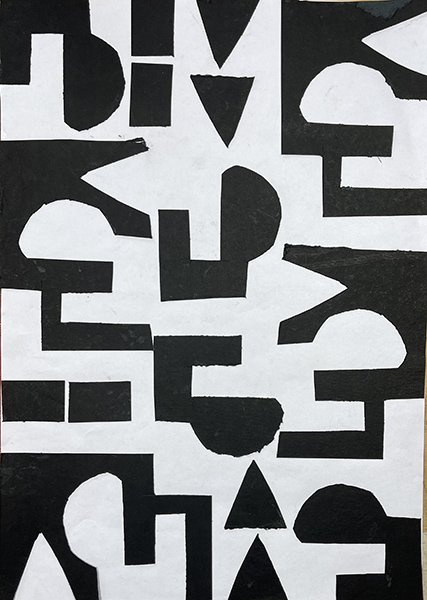
One of the first exercises I get my students to do in a block printing workshop, is to cut out several pieces of the same shape from coloured paper and arrange these on an imaginary grid.
This is an informal and fun exercise to get our mind thinking about positive and negative spaces (the solid shapes – ‘positive’ and background spaces ‘negative’ ) and the relationships between the shapes.
I also find it sooooooo therapeutic! Just taking your mind off the hook, and enjoying the rhythm of repetition.
Practical
Start by folding a piece of coloured A4 paper, several times so you can cut multiples of the same shape from it.
Lay these on a larger piece of contrasting paper, imagining that the shapes are laying on a grid.
Work quickly and have fun exploring all the possibilities. Don’t over think, make this a playful exercise.
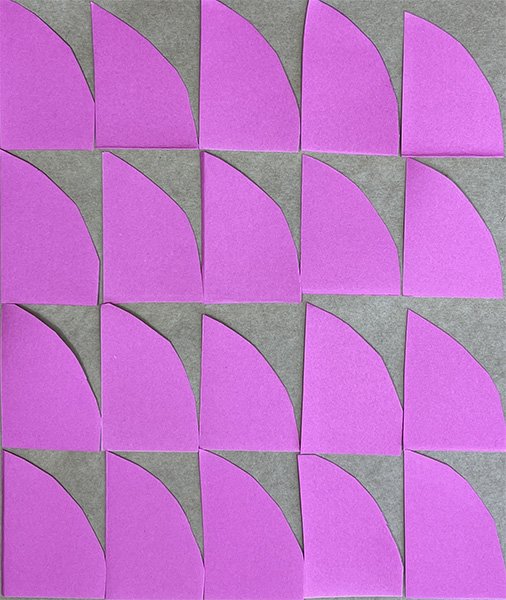
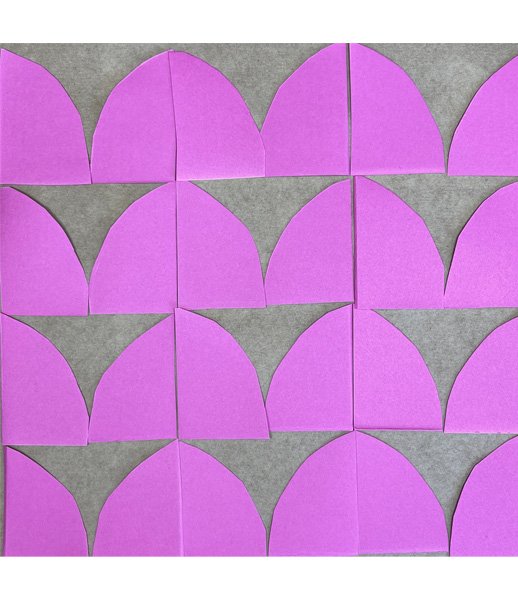
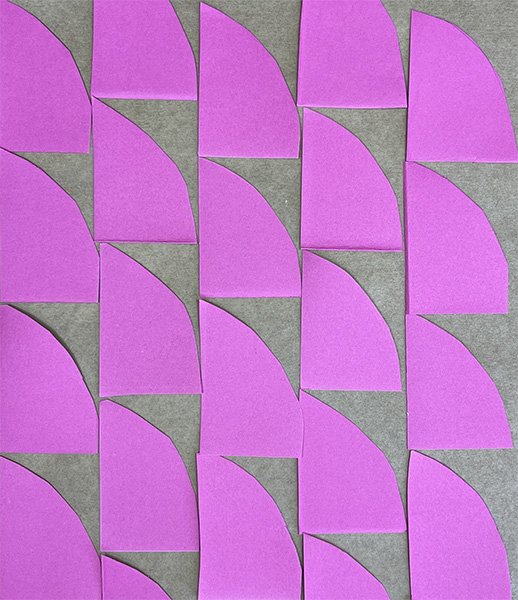
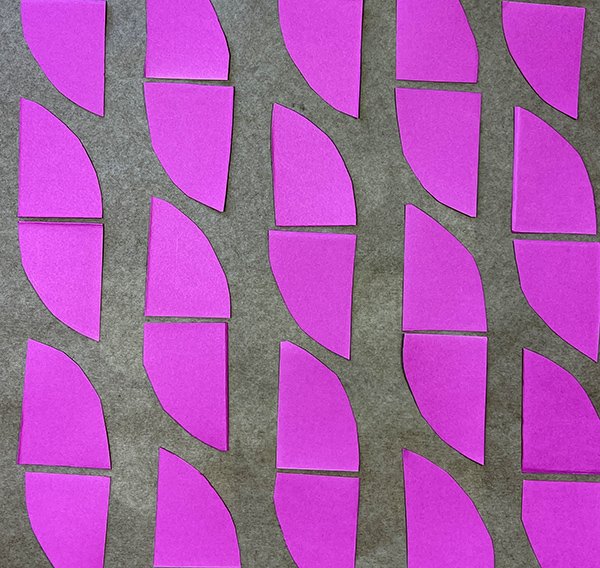
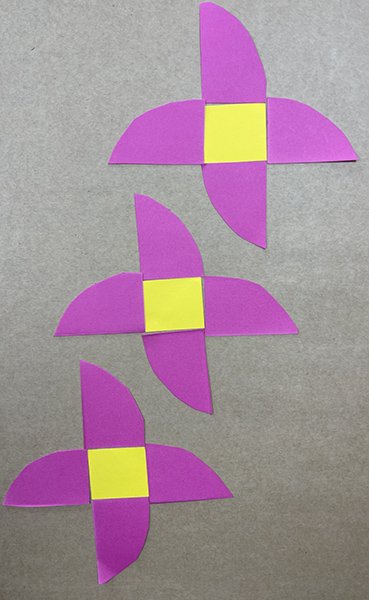
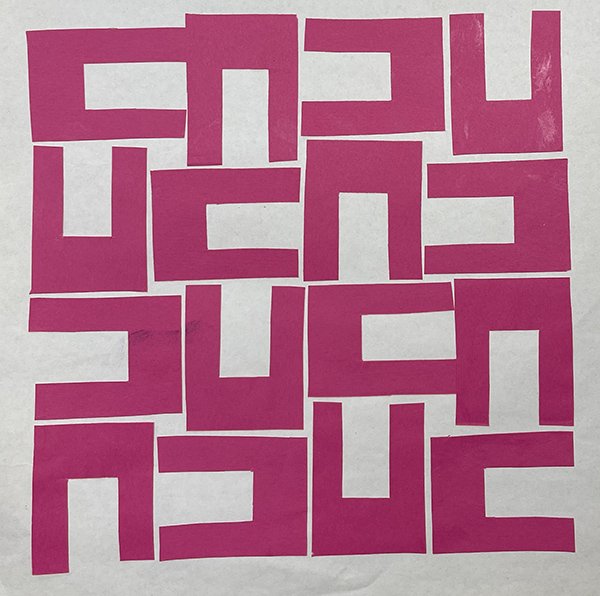
Here are some examples of a block pattern repeat using exactly the same shapes but playing with rotations.
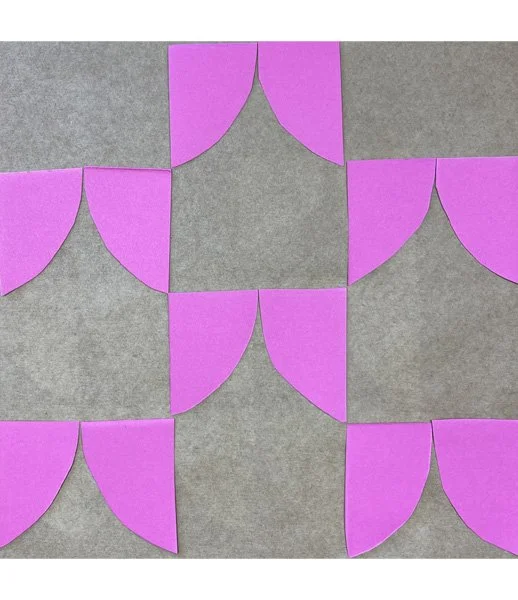
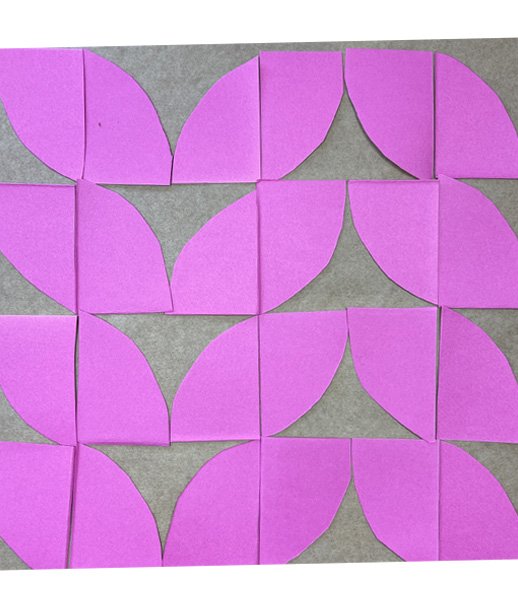
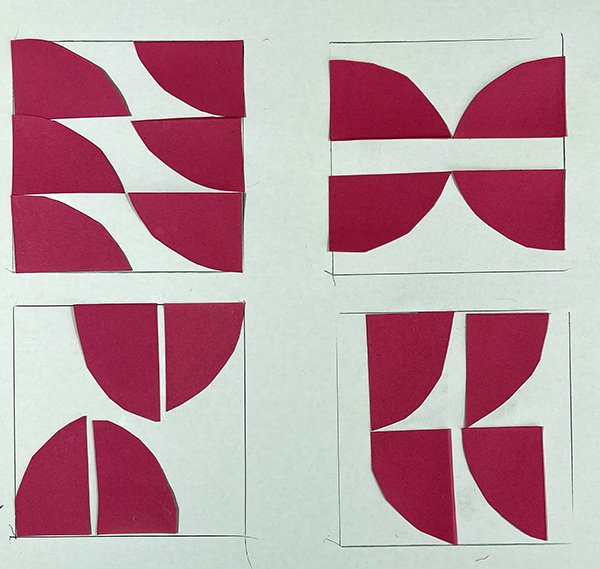
The half drop, or half brick
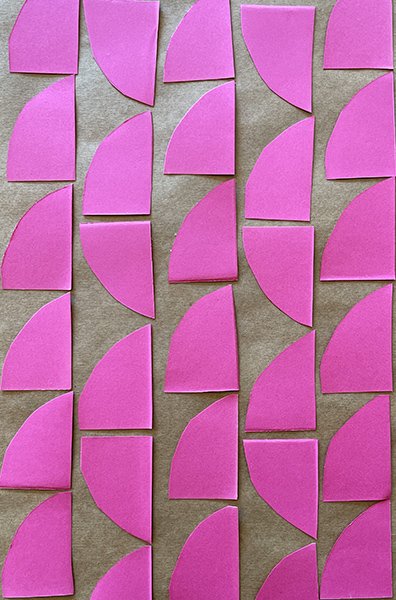
Another most commonly used pattern repeat, and makes the block repeat a little more interesting, is the half drop, or half brick, vertically or horizontally.
It’s really fun to see how much you can do with multiples of the same shape.
Always pay attention to the balance between the positive and negative spaces.
Then what happens if you introduce another shape?
A smaller shape? A contrasting colour?
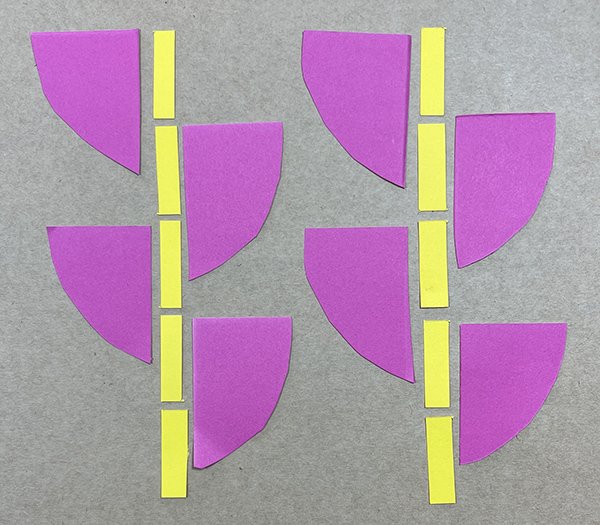
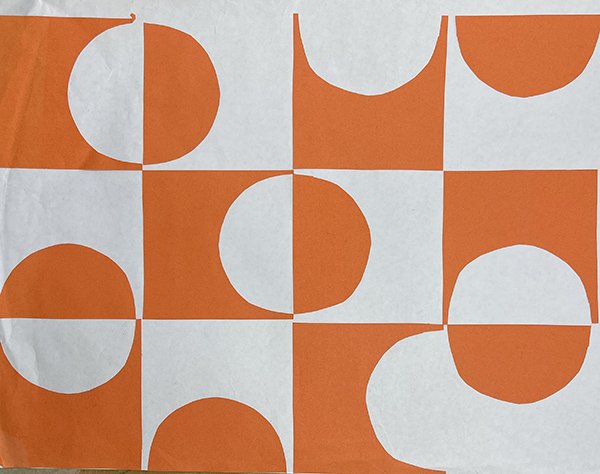
Here is a selection of examples my students have done.
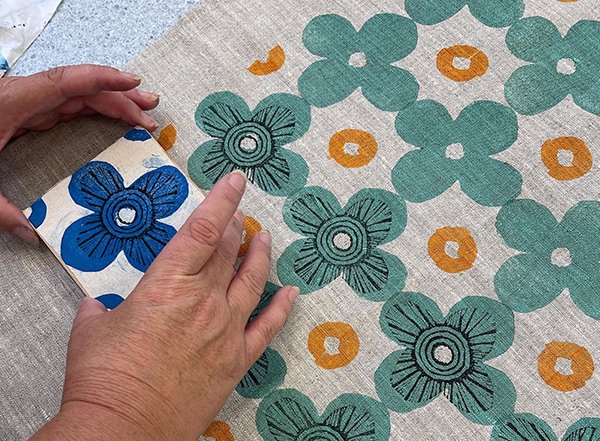
Tile repeats – Making a stamp
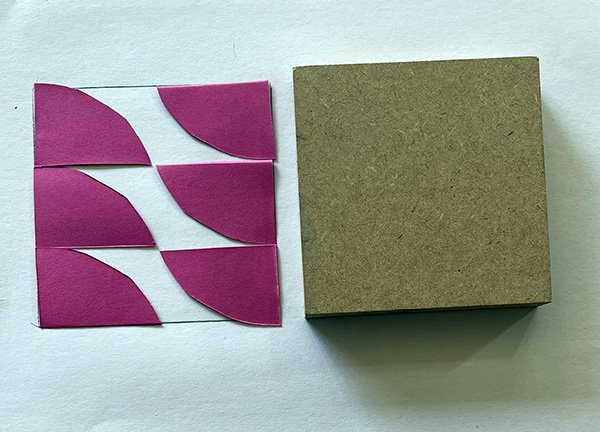
In my workshops we use a 100mm x 100mm MDF tile. This is an easy size to manage, for hand printing.
Following on from the simplicity of the cut out paper shapes, we use 3mm foam (which is a little like potato printing, in that it gives a good coverage and solid print, but it needs to be simple)
Again, think about the relationship between those positive and negative spaces.
Practical
Draw around your block, so you know what size you are working with
Using coloured paper, begin to work out the shapes you like that can then be repeated as a block pattern. This can be based on the first exercise or you could try something new.
Once you are happy with a concept, glue the shapes down onto the paper
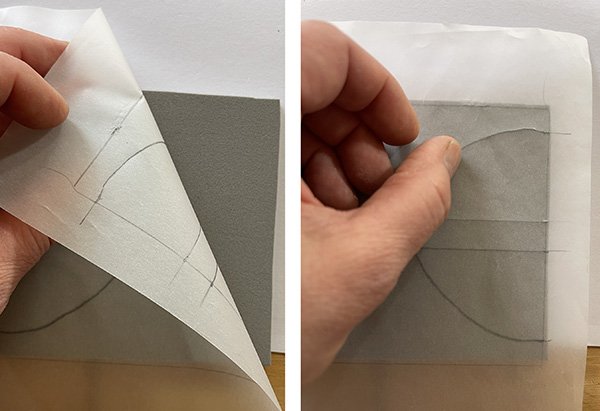
Use tracing paper to copy the design in pencil
Now you are ready to transfer the shapes onto the foam.
Carefully place the tracing paper pencil side down onto the foam and gently rub the tracing paper to transfer the image
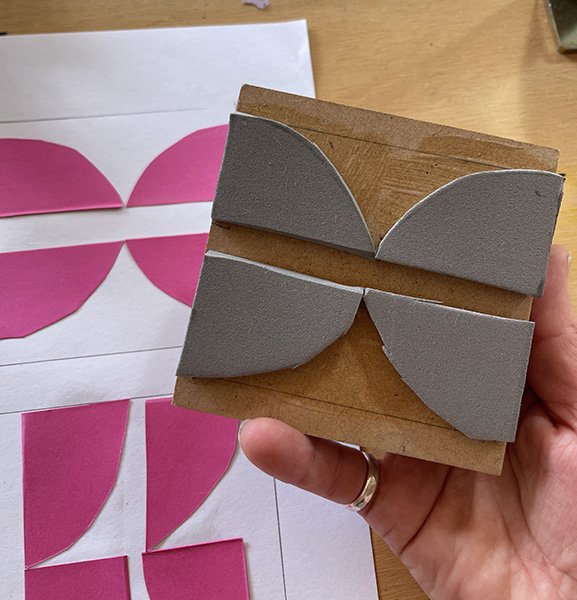
Cut out the shapes with scissors and glue with PVA
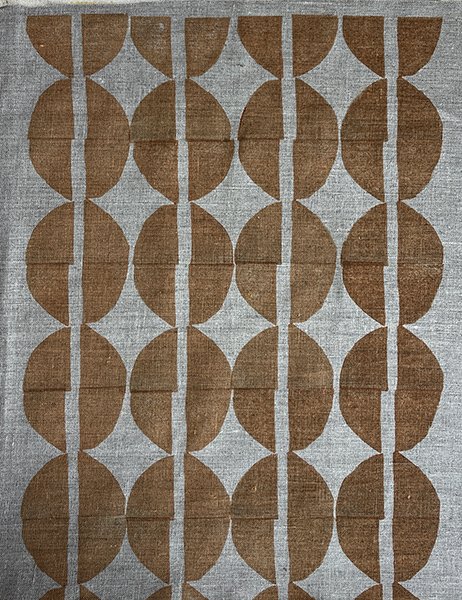
When dry, ink and print!
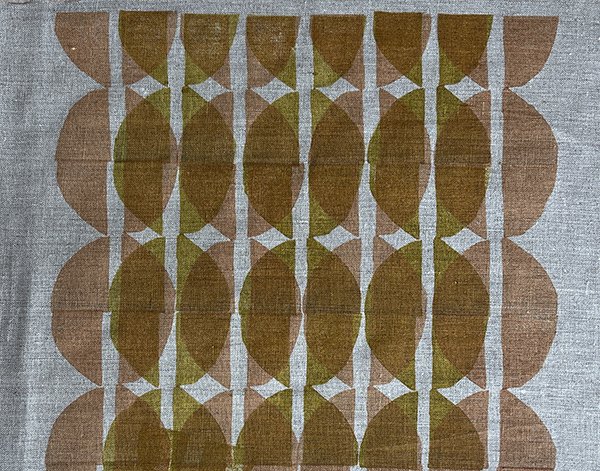
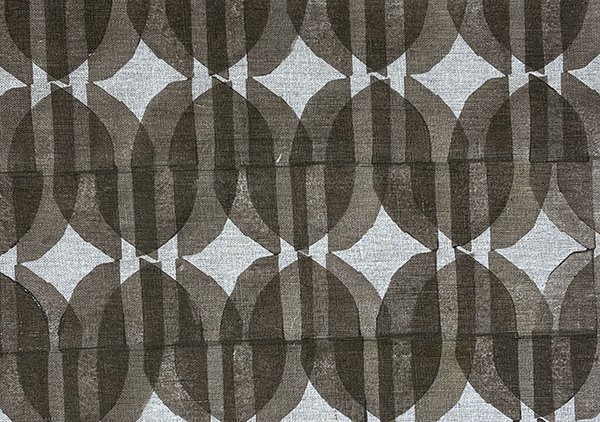
We use a foam roller and textile inks that have a transparent base (not opaque) so you can overprint your designs to create more tones.
Have a rag handy for wiping any excess ink off your block, (and your fingers!)
Some further examples below. These are all students work. (some carved blocks in combination with the foam blocks.
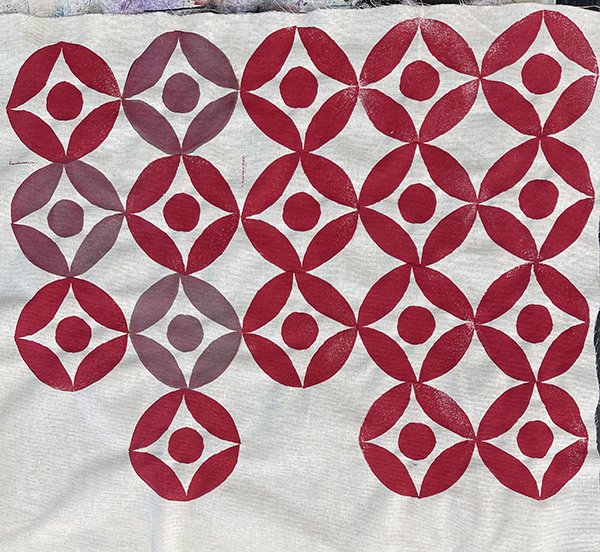
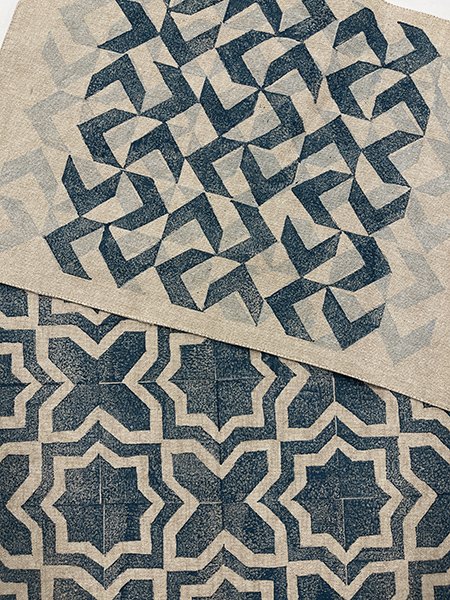
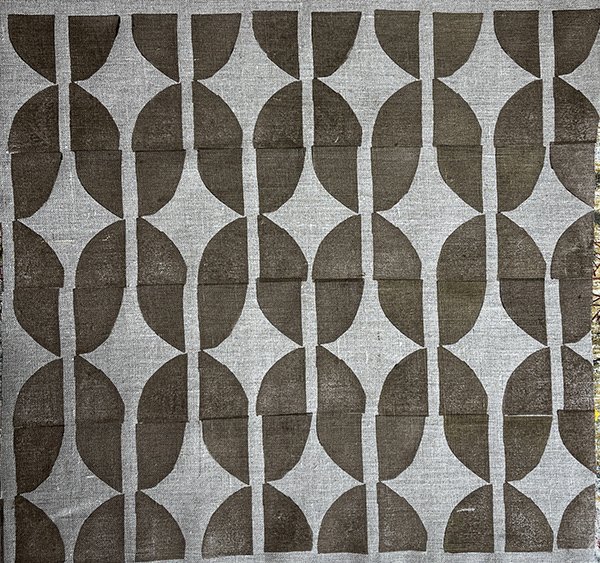
Tile rotation repeat
This is when the pattern connects as you rotate the tile 90/180/360 degrees etc.
You can use tracing paper to see how this repeat might look as you rotate it various ways.
In this scenario you will need to mark evenly spaced measurements around the outside of the block.
Again, think back to everything being on a grid. Simple often works best!
Practical
Trace around your block on graph paper, or draw a 10cm x 10cm square for more accuracy!
Measure evenly spaced points around the sides of the square (must be even numbers)
Draw a design with lines that end on the points you have marked.
Make duplicates of the same design, either by tracing or by eye, to see what happens when you rotate the individual design with different rotations
Here are some examples I have drawn on the computer to illustrate this:
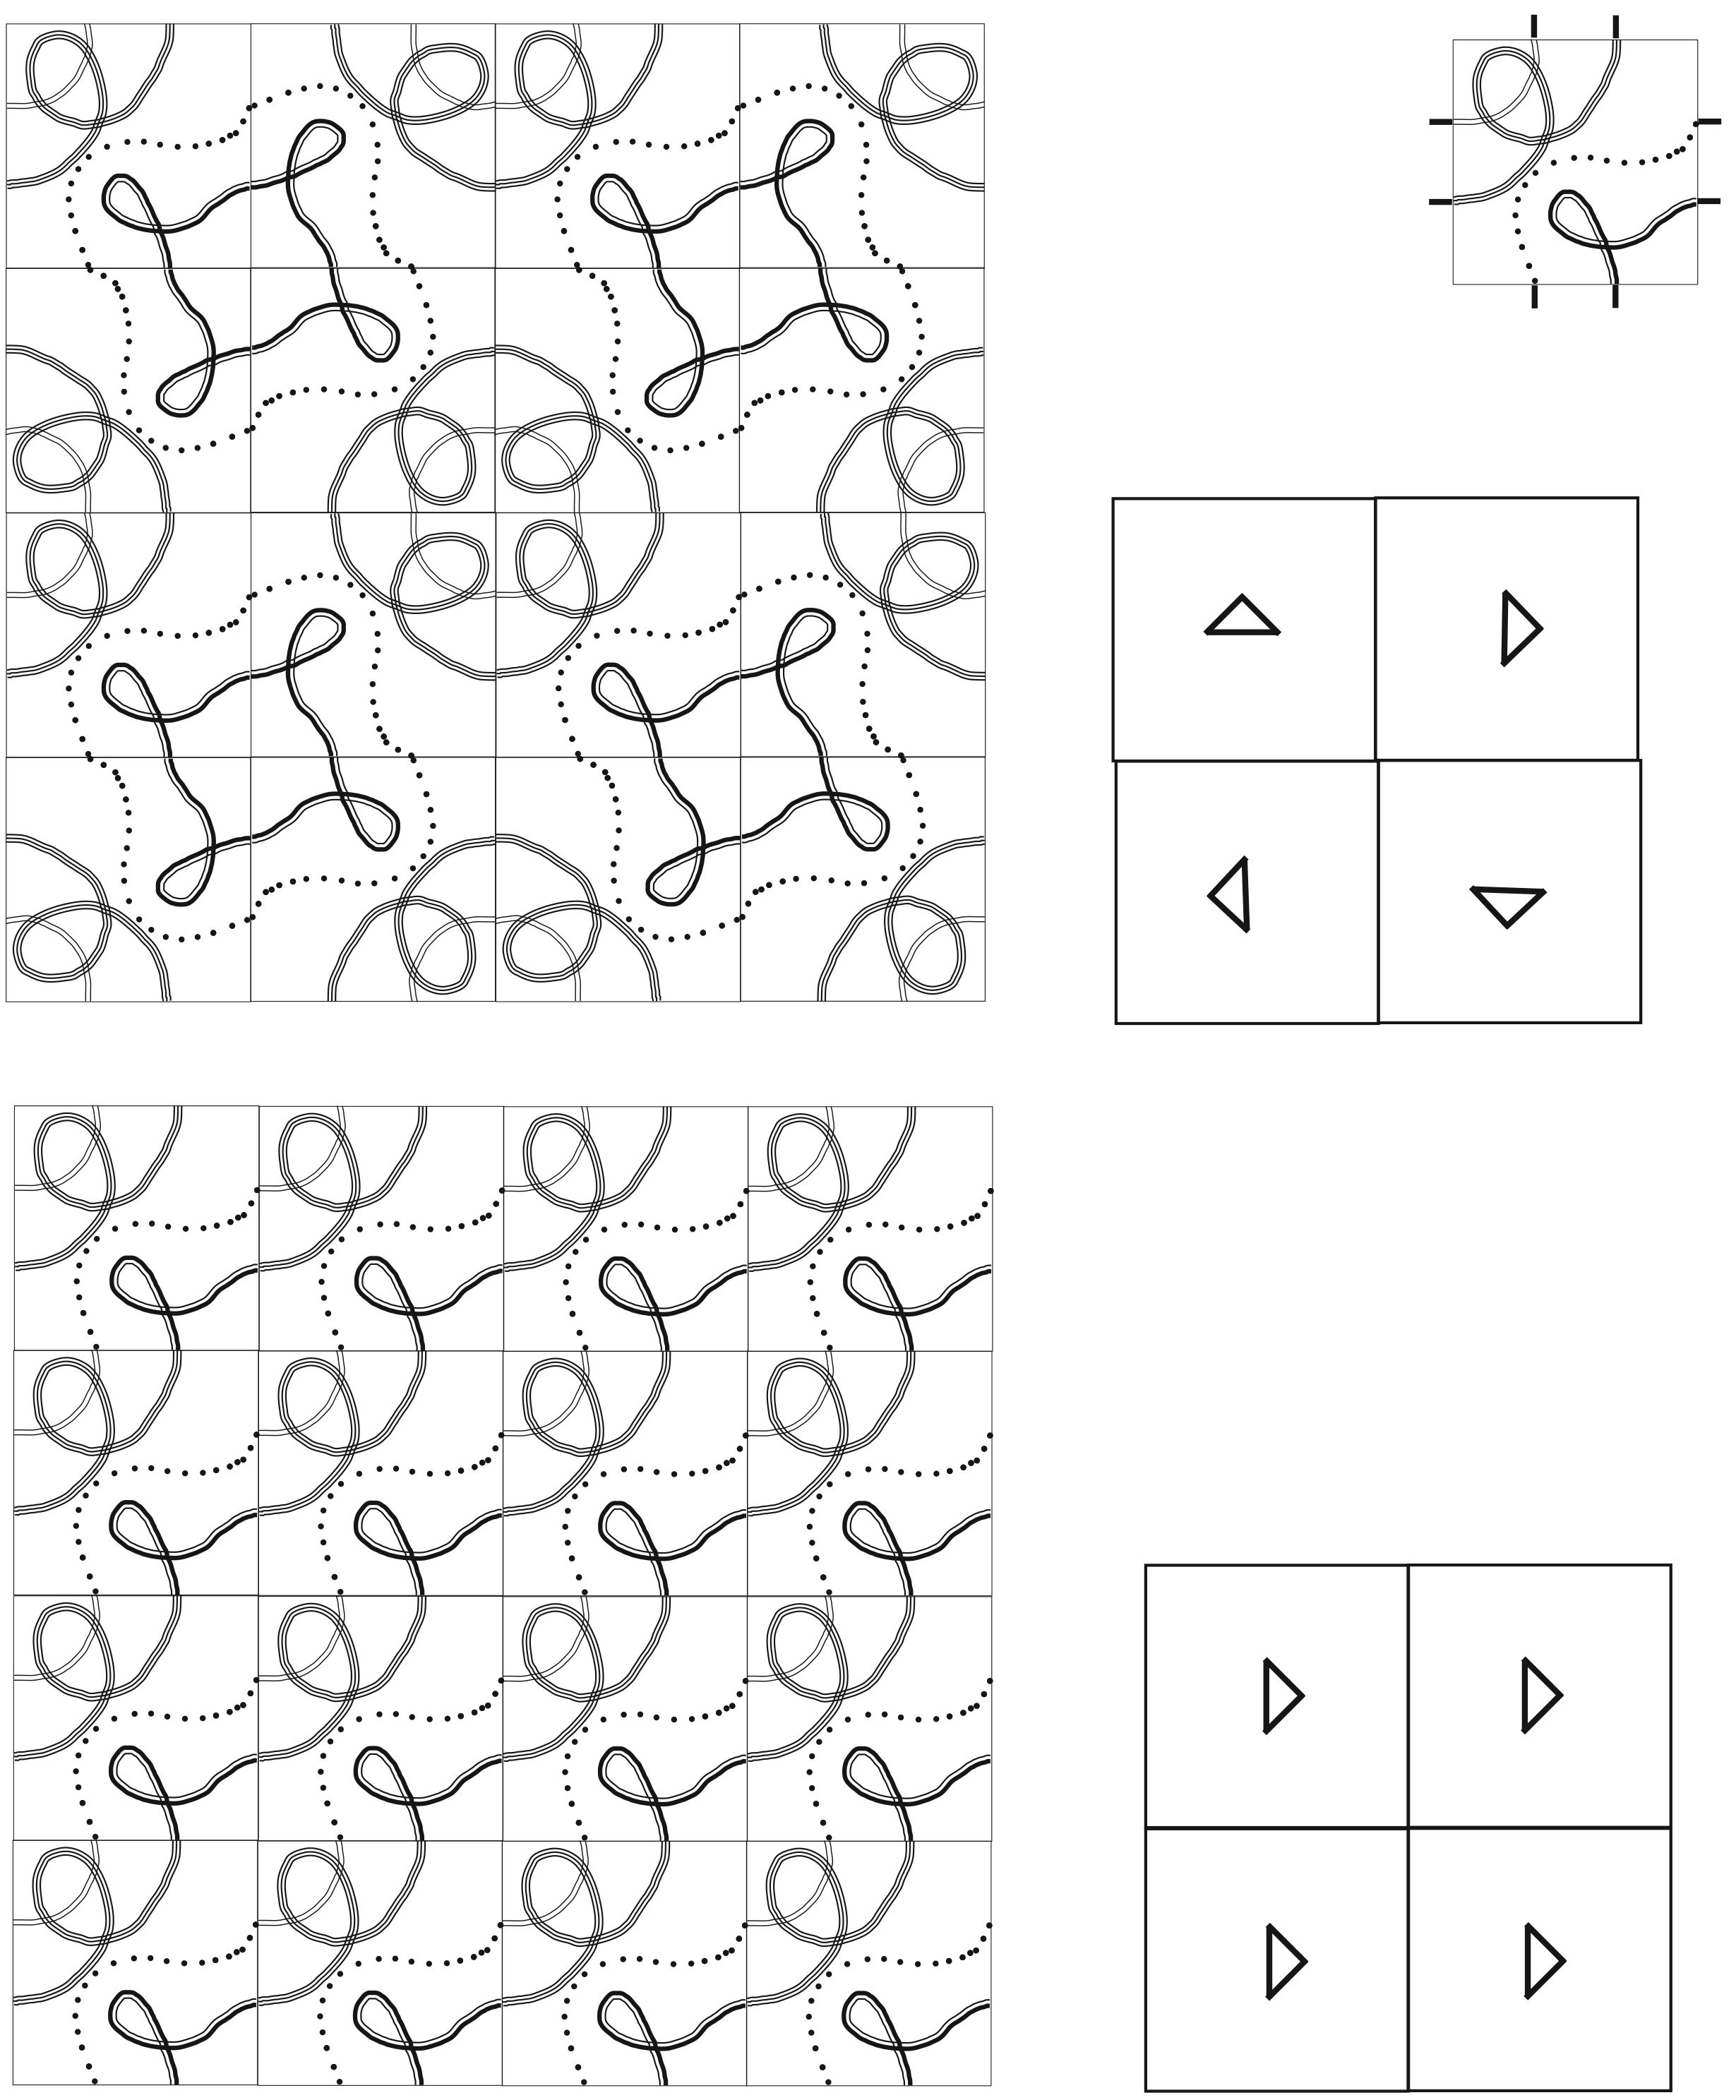
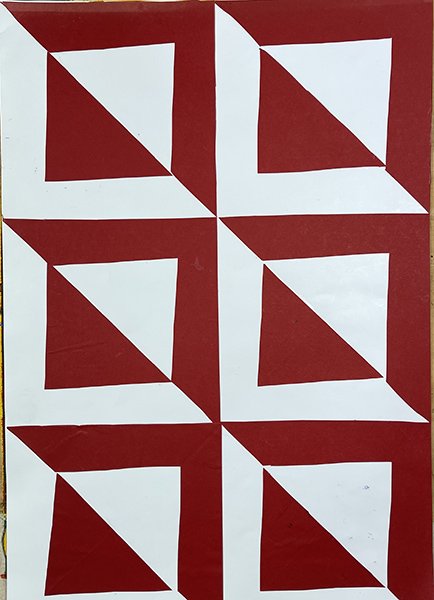
Tile rotation using the same block design

Below are examples done by wonderful students.
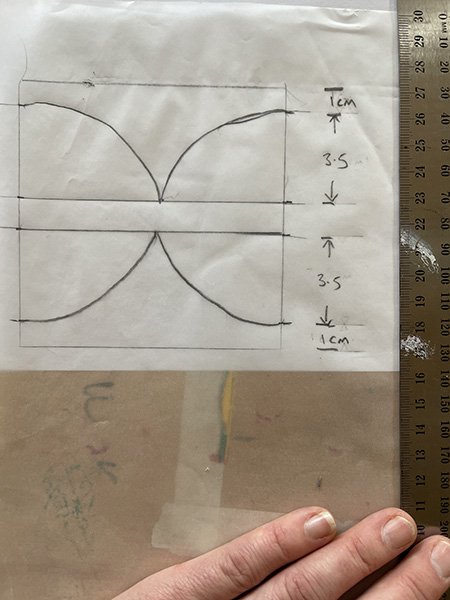
The continuous repeat
A continuous repeat is possibly the most difficult to create, and it is where all the edges of the artwork should line up seamlessly.
It is something you can also do in the block printing workshops if you are ambitious enough!
There are a few ways to go about creating a continuous repeat, and I’ll share with you the method I learnt yonks ago!
Practical
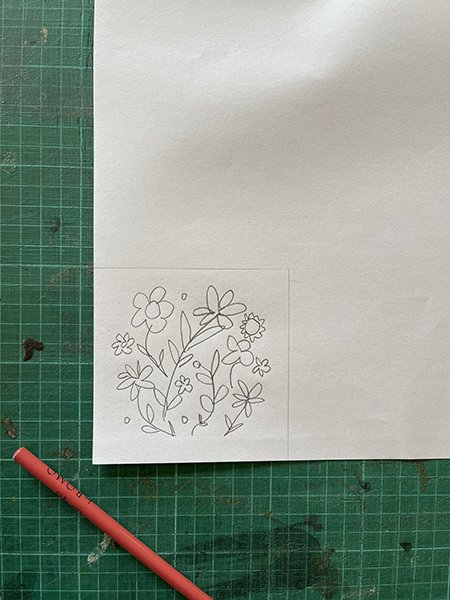
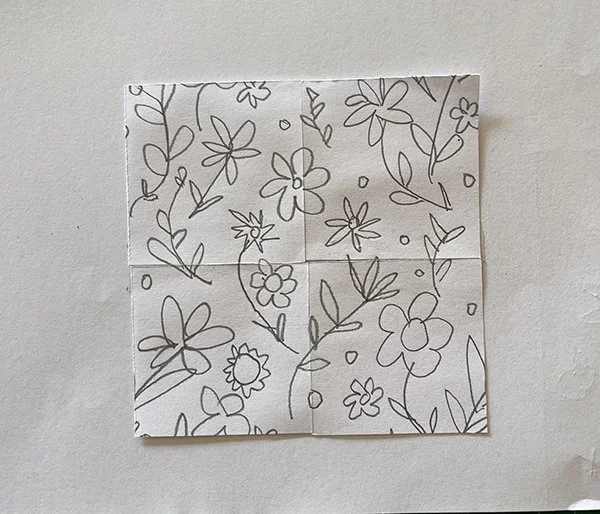
You start by drawing a design inside an area without touching the sides, in this case I used the same size as the MDF block, 100mm x 100mm.
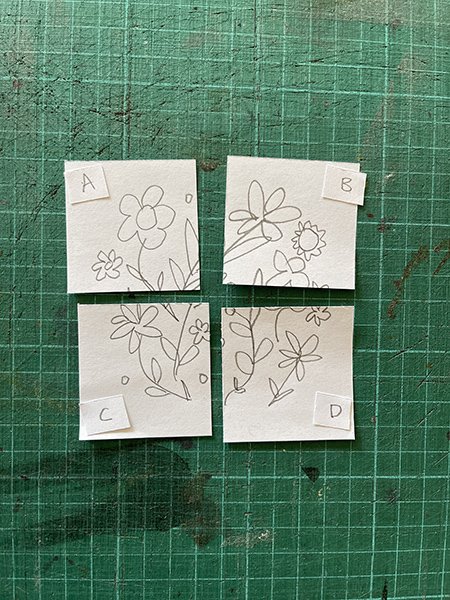
Now slice the image into 4 even squares
Rearrange, so the design now sits in each corner. To help, you can label them, A,B,C,D.
You are swapping sides A + B, and C + D over, (so now you have
B + A and D + C), then move the B + A to below D + C. (make sense!?) Look at the images below.
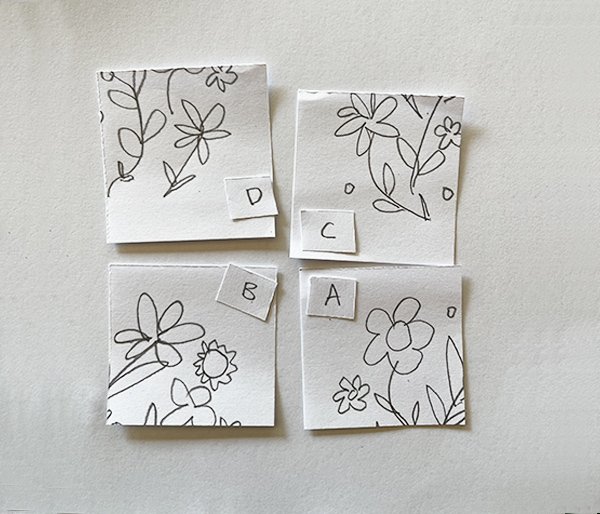
Now all sides will match as they sit side by side and above and below each other. Tape them together.
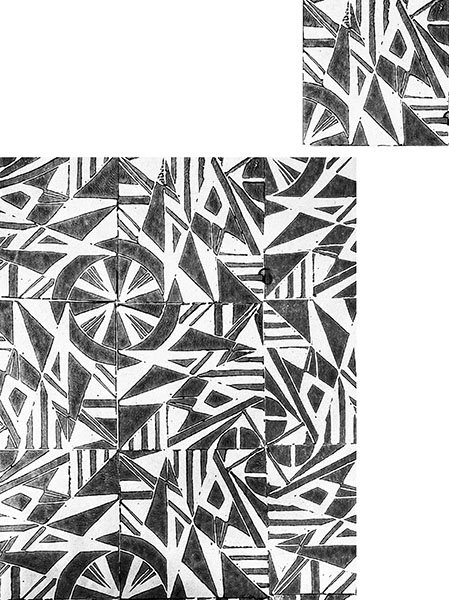
You’ll need to then draw inside the empty space, to fill out the design.
This is a bit rough! See last image, but you get the idea?
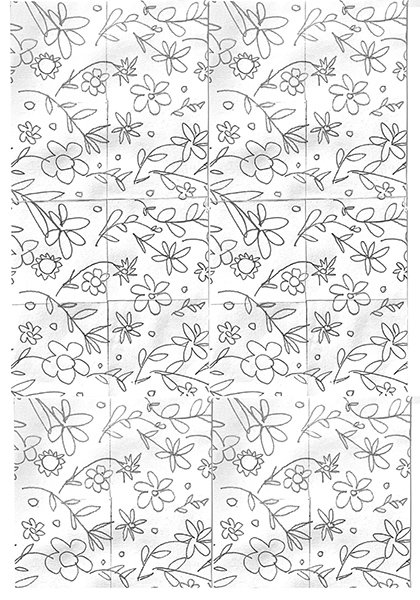

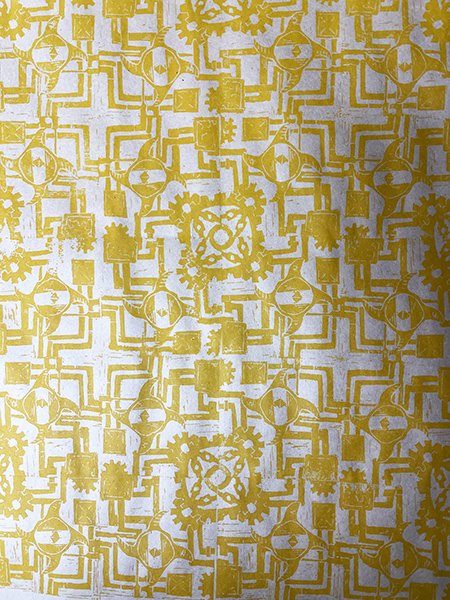
Students work. Continuous repeat, block print example.
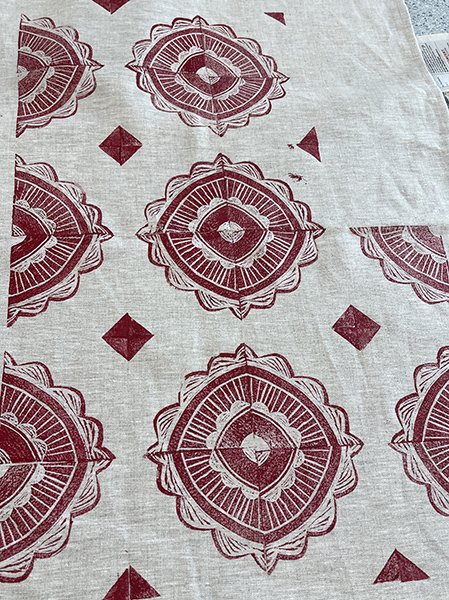
Now let’s see some more of this pattern repeating in action, with some of our textile design hero’s (and you can find more on my Pinterest pages)
Here’s some beautiful half drop in action. I just love these textures, and original vintage designs.
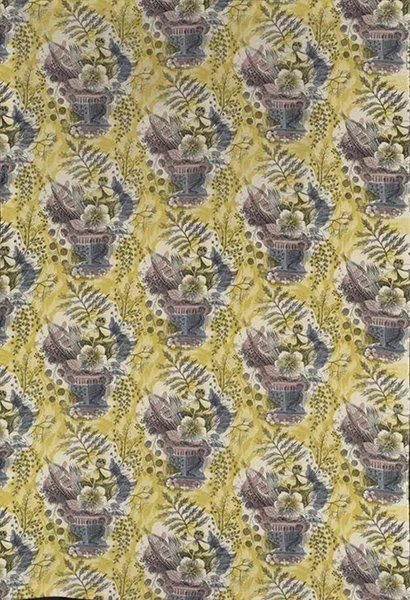
L'Epoque, Furnishing fabric by Mary Harper 1951
L'Epoque, Furnishing fabric by Mary Harper 1951

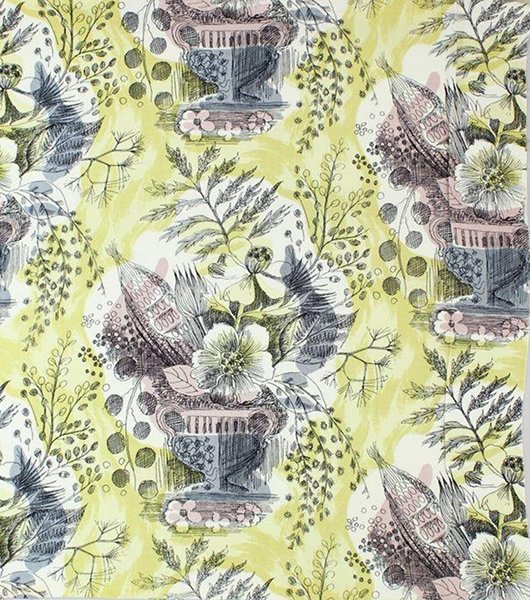
Bon Viveur Furnishing fabric by Mary Harper 1952
I love the simplicity of these - Block repeats with alternating motifs.

Pheasant, Furnishing fabric, manufactured by Gayonnes Ltd, 1952

Coptic, Furnishing fabric, designed by Barbara Pile 1951
The genius simplicity of Orla Kiely’s designs are pretty clever examples of tile rotation repeats.
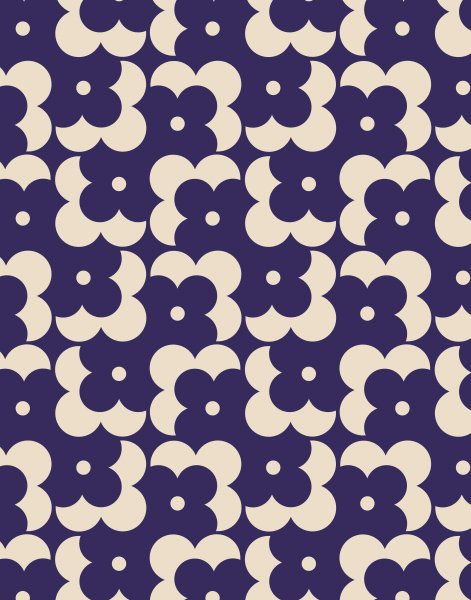
Flower Shadow - Orla Keily

Acorn Cup - Orla Keily
Can’t talk about patterns without mentioning William Morris, the master of Continuous naturalism pattern repeats. Although his carved blocks weren’t so much square tiles, they were organically shaped to seamlessly flow and connect in layers.
Here’s a dreamy video for you to get a sense of this remarkable craftsmanship, (thanks to the Victoria and Albert Museum).
And that’s where I’ll leave you. Happy pattern travels to you, my friends!
Katie

Acanthus wallpaper block print, 1875 - William Morris